Customize record forms (Form Layout Editor)
Every table has a form that people use to create and edit records. The Form Layout Editor lets you arrange that form: reorder fields, group them into sections, columns, and tabs, add child tables inline, and brand printed records with a logo, signature, or watermark.
Open the editor
- In a table, click ⋯ → Form layout, or
- Open the command palette (⌘K) and choose Edit Form Layout.
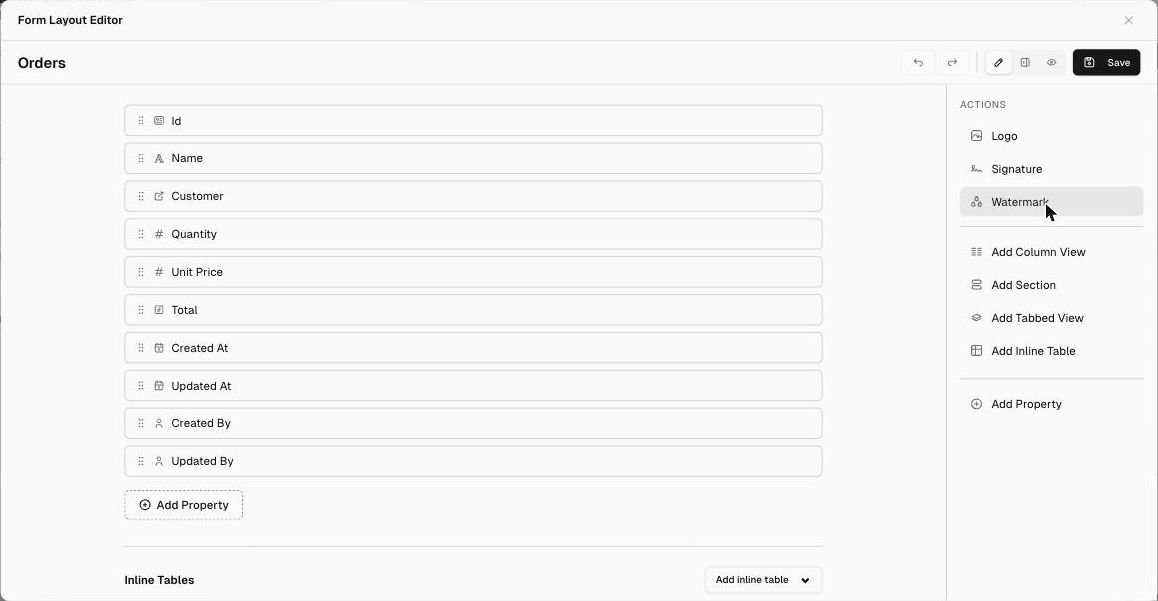
What’s in the editor
Canvas (center): the list of fields in form order. Drag the handle (⋮⋮) to reorder them. Click + Add Property to add a field.
Actions panel (right)
| Action | What it does |
|---|---|
| Logo | Adds your logo to the form and printed records |
| Signature | Adds a signature area |
| Watermark | Adds a watermark to printed records |
| Add Column View | Places fields side by side in columns |
| Add Section | Groups related fields under a heading |
| Add Tabbed View | Splits the form into tabs |
| Add Inline Table | Shows a child table inside the form (for example Order Lines inside an Order) |
| Add Property | Adds a field to the form |
Toolbar (top right): Undo / Redo, Edit mode, Split (edit and preview side by side), Preview, and Save.
Inline tables (line items)
At the bottom of the canvas, Inline Tables → Add inline table lets you add any table inside this form:
- Linked tables (tables that already reference this one) attach directly.
- Unlinked tables get a new Reference column automatically on the child table, pointing to this table’s ID.
This is how you build transactional forms such as Sales Order + Order Lines, Invoice + Invoice Lines, or Purchase Order + PO Lines.
Best practices
- Put the most important fields at the top.
- Use sections and columns for pairs such as Start Date / End Date or Status / Priority.
- Keep mandatory fields visible. Don’t hide a required field with a display rule.
- Use Display rules to show fields only when they’re relevant.