Finding your way around ERP•AI
ERP•AI has two main areas: the organization workspace, where you manage apps, people, and billing, and inside an app, where you work with tables, pages, and workflows.
1. The organization workspace
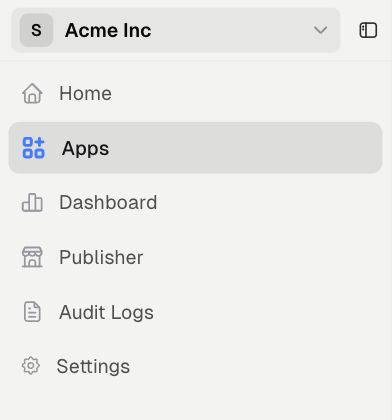
When you sign in you land in your organization’s workspace. The left sidebar contains:
| Sidebar item | What it’s for |
|---|---|
| Organization switcher (top left) | Switch organizations, create a new organization, open Organization Settings, Upgrade, Report an issue, or Sign Out. |
| Home | Browse Apps, the catalog of published apps (search, category filters, Most Started, Complete Suites), plus Build your own app. |
| Apps | All apps in the organization: search, sort, favorite, open, create, or invite people. |
| Dashboard | An overview of the organization: number of apps, users, credits, records, tables, workflow runs, and usage trends. |
| Publisher | Publish your apps to the ERP•AI marketplace. |
| Audit Logs | Every action taken across the organization. |
| Settings | Organization and personal settings (members, roles, API keys, credits, profile…). |
The bell icon (top right) opens your notifications.
2. Inside an app
Open any app from Apps to go inside it.
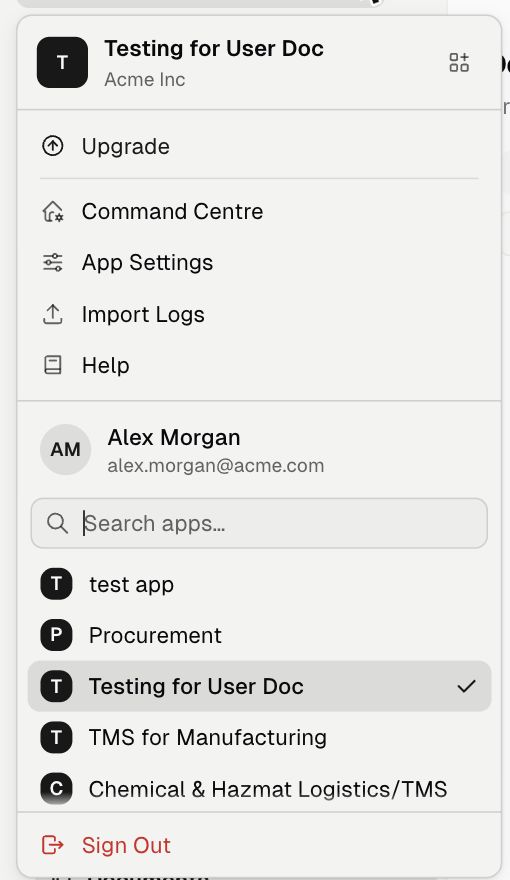
App header (top left)
Click the app name to open the app menu:
- Upgrade: buy credits or change your plan
- Command Centre: plan, releases, environments, snapshots, usage, API docs
- App Settings: general settings, theme, currency, storage, connections, access, permissions
- Import Logs: history of data imports
- Help
- Report an issue: send a problem report to the ERP•AI team
- App switcher: search for and jump to another app
- Sign Out
The icon next to the app name collapses or expands the sidebar.
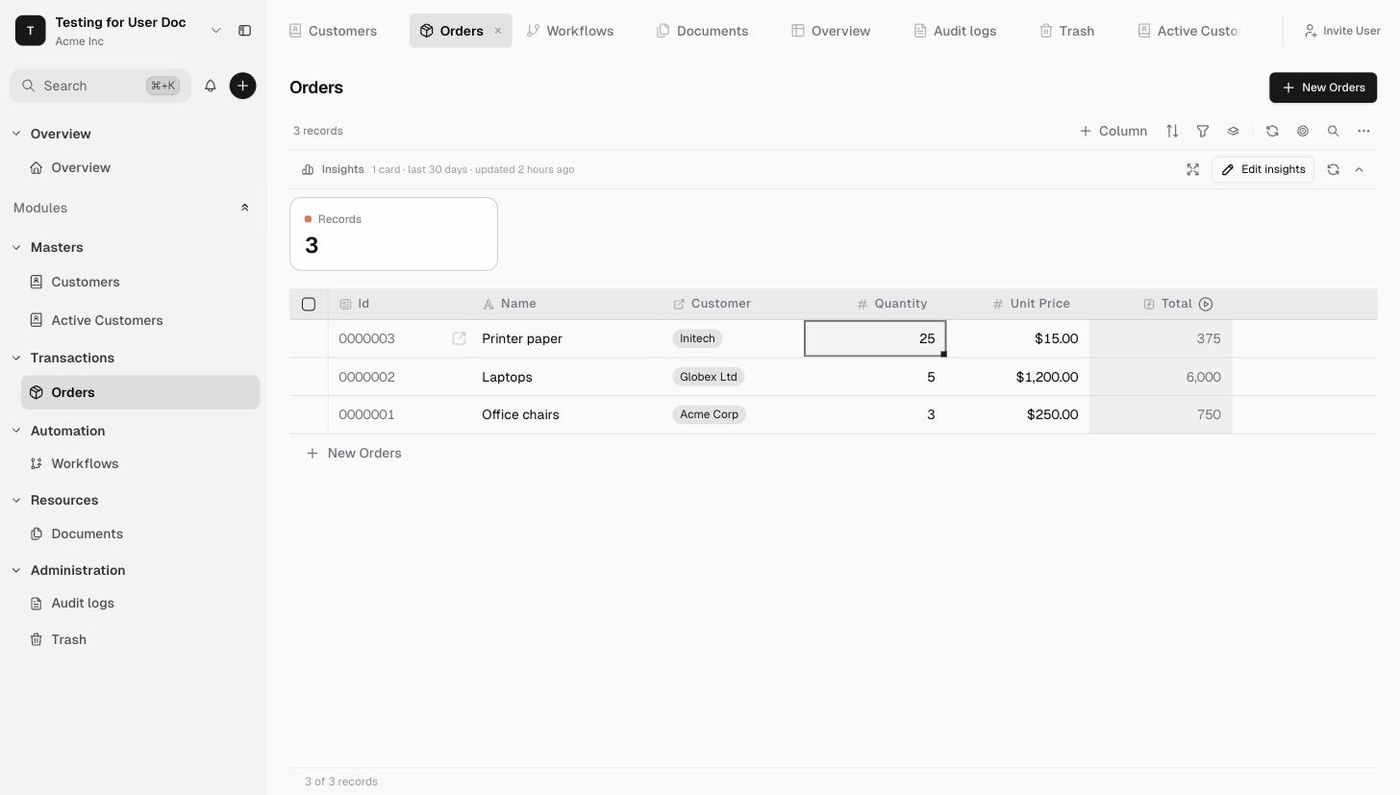
App sidebar
| Section | Contents |
|---|---|
| Search (⌘K / Ctrl+K) | Search pages, tables, and commands |
| + (next to search) | Add a New Table, Import a file as a table, or create a view from an existing table |
| Overview | The app’s home page, with shortcut cards to every module |
| Modules | Your categories (for example Masters, Transactions, Pages) with their tables, views, and custom pages |
| Automation → Workflows | The app’s workflows |
| Resources → Documents | Documents and templates |
| Administration → Audit logs / Trash | App-level change history and deleted items |
Hover over a sidebar item and click ⋯ for options such as Edit, Rename, Duplicate, Move to section, Set as main page, Version history, or Delete. The options depend on the type of item.
Tabs
Each table, page, or tool you open appears as a tab across the top of the app, much like browser tabs. Click a tab to switch to it, or click × to close it.
Invite User
The Invite User button (top right) gives a colleague access to this app.
3. Command palette (⌘K / Ctrl+K)
Click Search or press ⌘K (Mac) / Ctrl+K (Windows) to open the command palette. The search box covers pages, tables, records, and commands. From there you can:
- Jump to any table, page, or record
- Go to Workflows, Documents, Audit Logs, or Trash
- Open Roles, Users, or App Settings, and Command Centre pages such as API Docs and Data Health
- Inside a table, run actions such as Add Record, Add Column, Toggle Filter, Toggle Sort, Toggle Group By, Export Records, Import Records, or Edit Form Layout
- Switch the current table to another layout (Tabular View, Kanban View…)