Quick start: build your first app in 10 minutes
In this guide you’ll build a small sales-tracking app with two linked tables, Customers and Orders. Along the way you’ll use the core ERP•AI features: tables, field types, links between tables, calculated fields, records, layouts, and views.
Time: about 10 minutes
You need: an ERP•AI account and a role that can create apps (for example App Creator or Super Admin).
Step 1: Create the app
- Sign in at apps.erp.ai. No account yet? See Sign up and sign in.
- Click Apps in the left sidebar.
- Click + New App (top right).
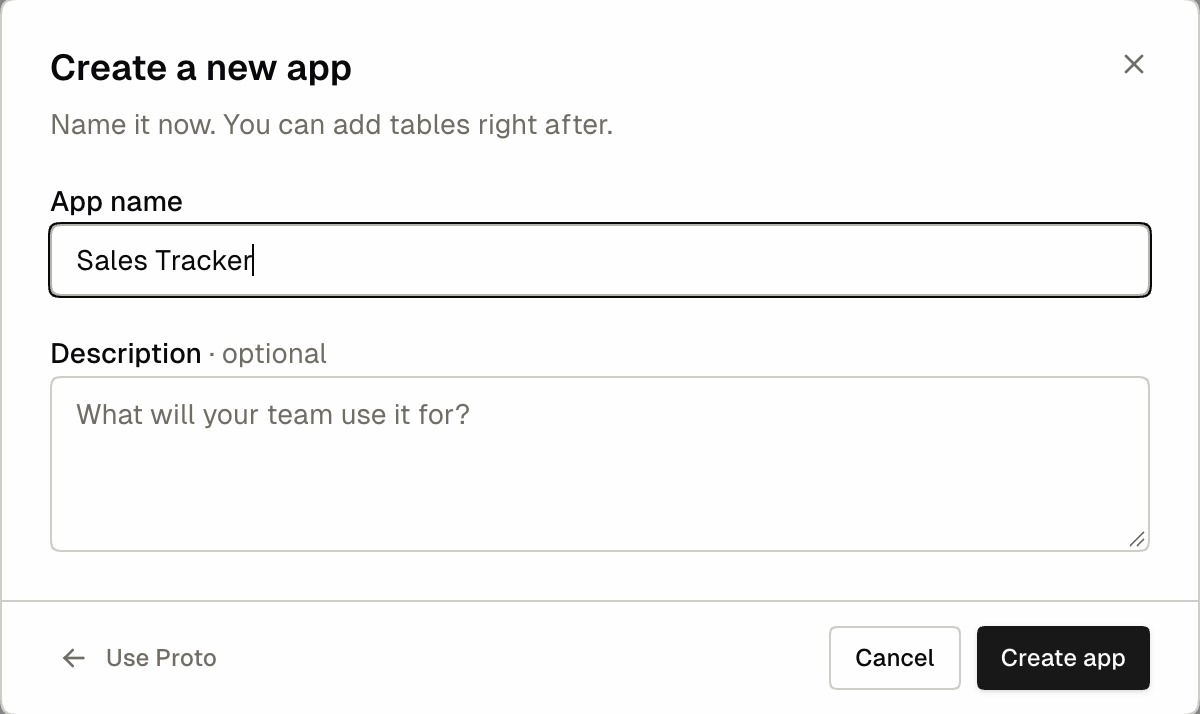
- In Create a new app, click Create manually instead.
- Enter an App name (for example
Sales Tracker) and an optional Description. - Click Create app.
The app opens, and ERP•AI asks you to Add your first table.
Step 2: Create your first table (Customers)
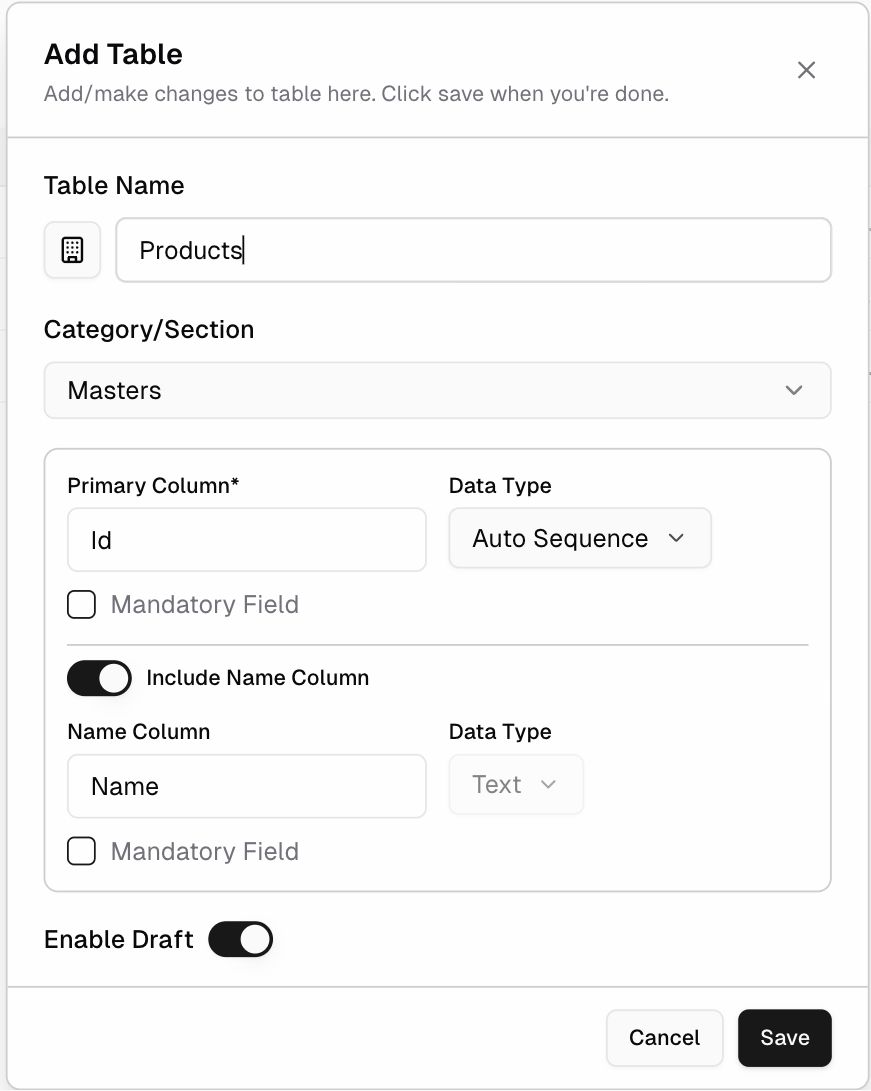
In the Add your first table dialog:
- Table Name: type
Customers. Click the icon button next to the name to choose an icon. - Category/Section: leave it as Masters. Categories are the groups you see in the app’s left sidebar.
- Primary Column: leave it as
Idwith data type Auto Sequence, so every customer gets a number automatically (0000001, 0000002…). - Include Name Column: leave it on. This adds a
Nametext field. - Enable Draft: leave it on. This lets people save incomplete records as drafts.
- Click Create table.
Step 3: Add fields to Customers
Click + Column above the table and pick a field type:
| Field name | Type | How to set it up |
|---|---|---|
| Status | Select | Replace Option 1 / Option 2 with Lead, Active, Churned |
| Type the name only | ||
| Customer Since | Date | Leave Display Time off |
| Account Manager | User | Leave Allow Multiple Users off |
For each field, type the name in Property name (ERP•AI calls fields properties or columns in some places; they’re the same thing) and click Save.
Step 4: Create a second table (Orders) and link it to Customers
- Click the + button next to Search in the left sidebar, then click New Table.
- Name it
Orders. Open Category/Section, click +, typeTransactions, and press Enter. - Click Save.
- Add these fields with + Column:
| Field name | Type | Setup |
|---|---|---|
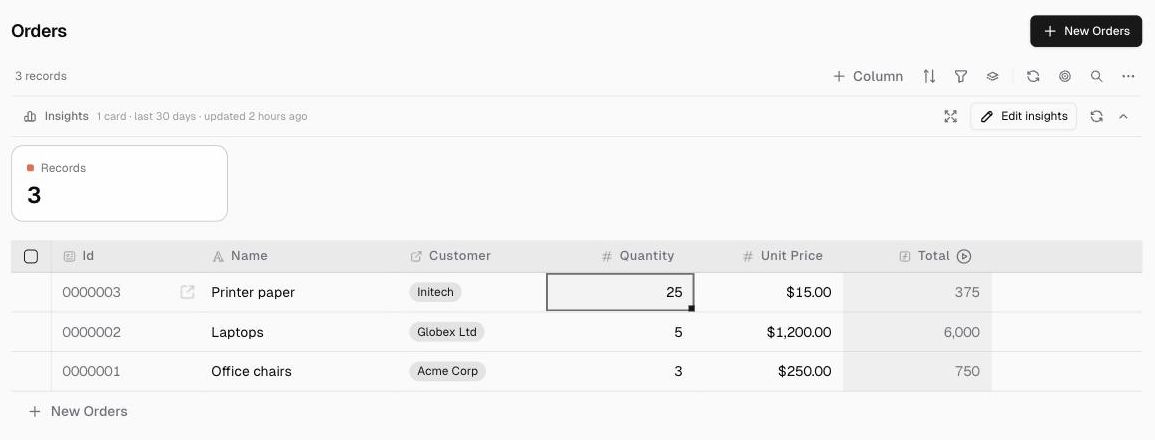
| Customer | Reference | Source Table: Customers. Column to Show: Name |
| Quantity | Number | Formatting: Integer |
| Unit Price | Number | Turn on Is Currency. Formatting: Decimal. Precision: 2 |
| Total | Formula | Output Type: Number. Formula: Quantity * Unit Price |
Step 5: Add a rollup to Customers
- Open Customers and click + Column → Rollup.
- Name it
Total Sales. - Source Table: Orders. Target Column: Total. Aggregate Function: SUM.
- Click Save.
Each customer now shows the total value of all their orders.
Step 6: Add records
- In Customers, click + New Customers. Fill in Name (
Acme Corp), Status (Active), and Email, then click Save. - In Orders, click + New Orders. Enter a Name (
Office chairs), pick Acme Corp under Customer, then enter Quantity3and Unit Price250. Total fills in automatically as750. Click Save. - Go back to Customers. Total Sales for Acme Corp now shows
750.
Step 7: Try a different layout
In Orders, click ⋯ (More options) → Layout → Board. Orders are now grouped into columns by Customer. Try Calendar, Gallery, Timeline, and Ledger too, then switch back to Table.
Step 8: Create a view
- Click + in the sidebar. Under Create a view from a table, click Customers.
- View name:
Active Customers. - Add/remove columns: choose Select all.
- Filter Data By → Add condition:
StatusisActive. - Click Save.
Active Customers now appears in the sidebar and shows only active customers.
You’re done! What’s next?
- Automate something: Build your first workflow
- Invite your team: first add people to the organization (Members), then give them the app (App access and permissions)
- Customize the entry form: Form Layout Editor
- Skip the manual work next time: Ask Proto to build the app