Import and export data
Bring existing data into ERP•AI from spreadsheets, or export records for reporting and backups.
There are two ways in: to add rows to an existing table, open the table and use ⋯ → Import; to create a new table from a file, click + at the top of the app sidebar and choose Import.
Import records into an existing table
- Open the table.
- Click ⋯ (More options) → Import. You can also open the command palette (⌘K) and choose Import Records.
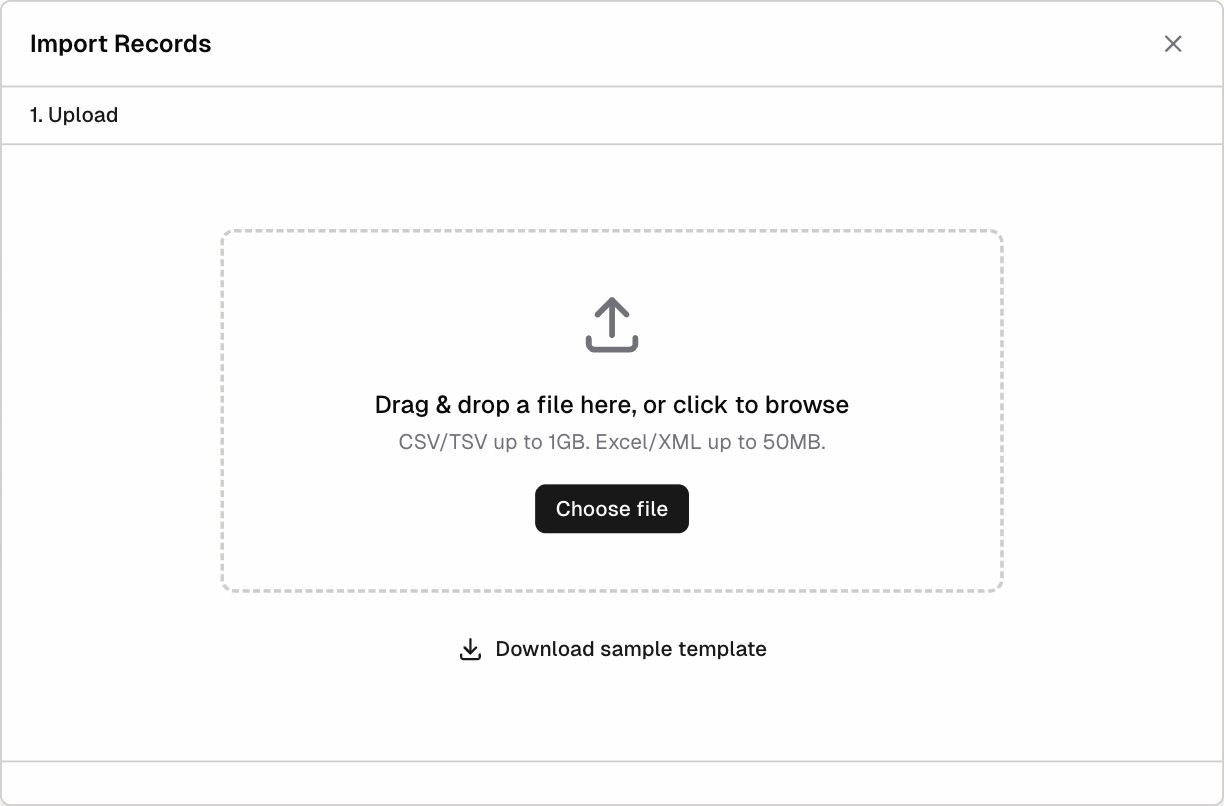
- In Import Records → 1. Upload, drag and drop a file or click Choose file.
- CSV/TSV files up to 1 GB
- Excel/XML files up to 50 MB
- Not sure how to format the file? Click Download sample template to get a file with the right columns.
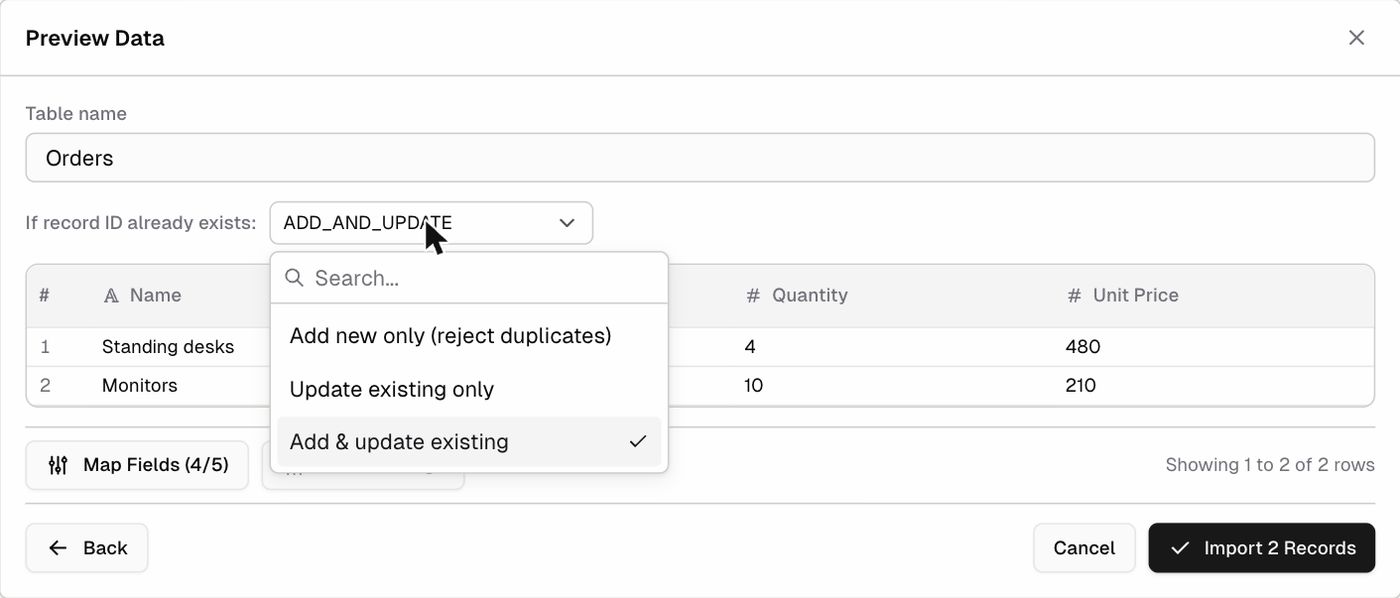
- The Preview Data step opens and shows the first rows of your file:
- Table name: the table you’re importing into.
- If record ID already exists: choose Add new only (reject duplicates), Update existing only, or Add & update existing (the default). A row matches an existing record when its unique ID is the same; matching records are updated.
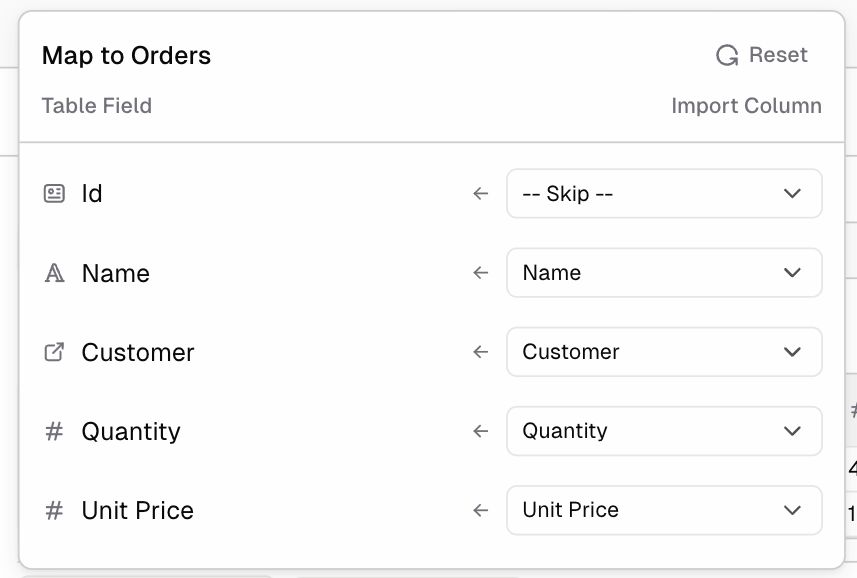
- Map Fields (x/y): match each Table Field to an Import Column from your file, or choose – Skip –. Click Reset to go back to the automatic matching.
- Other settings: Use first row as headers, Show invalid rows (show only rows with values that don’t match the field types), Allow empty mandatory fields, and Allow invalid select/multiselect values (import values that aren’t existing options).
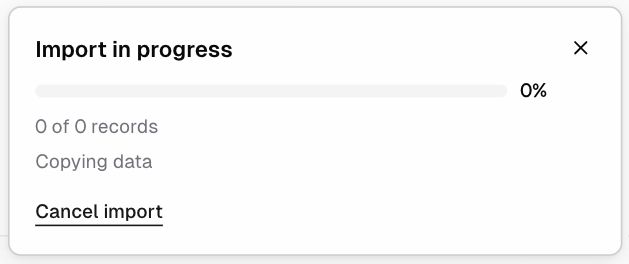
- Click Import N Records. The import runs in the background. An Import in progress card shows the progress, and you can click Cancel import. When it finishes, the new records appear in the table.
Create a new table from a file
In the sidebar, click + → Import (“From a CSV, Excel, or XML file”) to create a table directly from your file.
Check import progress
Open the app menu → Import Logs to see past imports and whether they succeeded.
Tips for clean imports
- Put column names in the first row.
- Match select values exactly as they are spelled in the table (for example
Active, notactive). - For Reference fields, use the display value of the linked record (for example the customer’s Name).
- Import master data first (Customers), then transactions (Orders) that point to it.
Export records
- Open the table or view. Apply filters first if you only want some of the records.
- Click ⋯ → Export, or choose Export Records from the command palette.
- In Export Table:
- Export Format: for example CSV
- Include External Table: include data from linked tables
- Include Hidden Columns: include columns that are hidden in the current layout
- Click Export.