Tables: create, organize, and manage
A table stores one kind of business object: Customers, Products, Orders, Employees, Tickets. Each row is a record and each column is a field. Tables appear in the app sidebar under their category/section.
Create a table
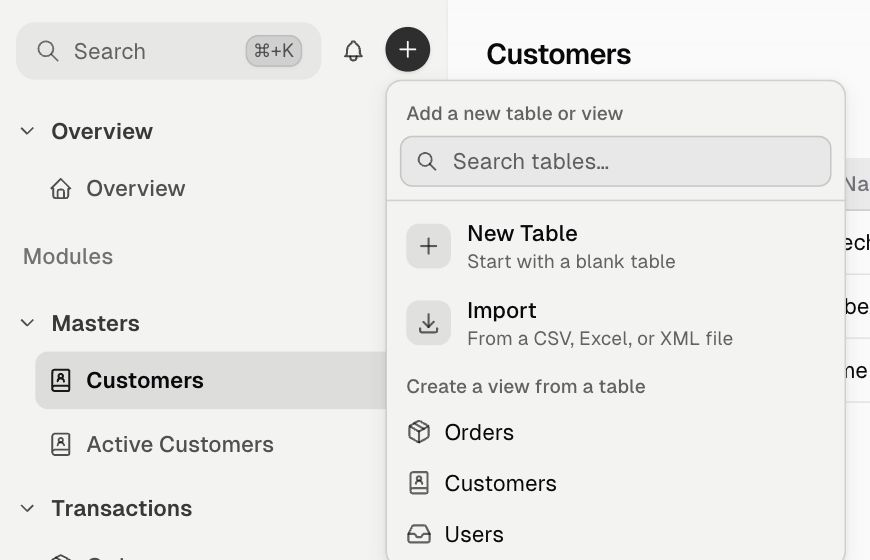
- Inside an app, click + next to Search in the sidebar.
- Click New Table (“Start with a blank table”).
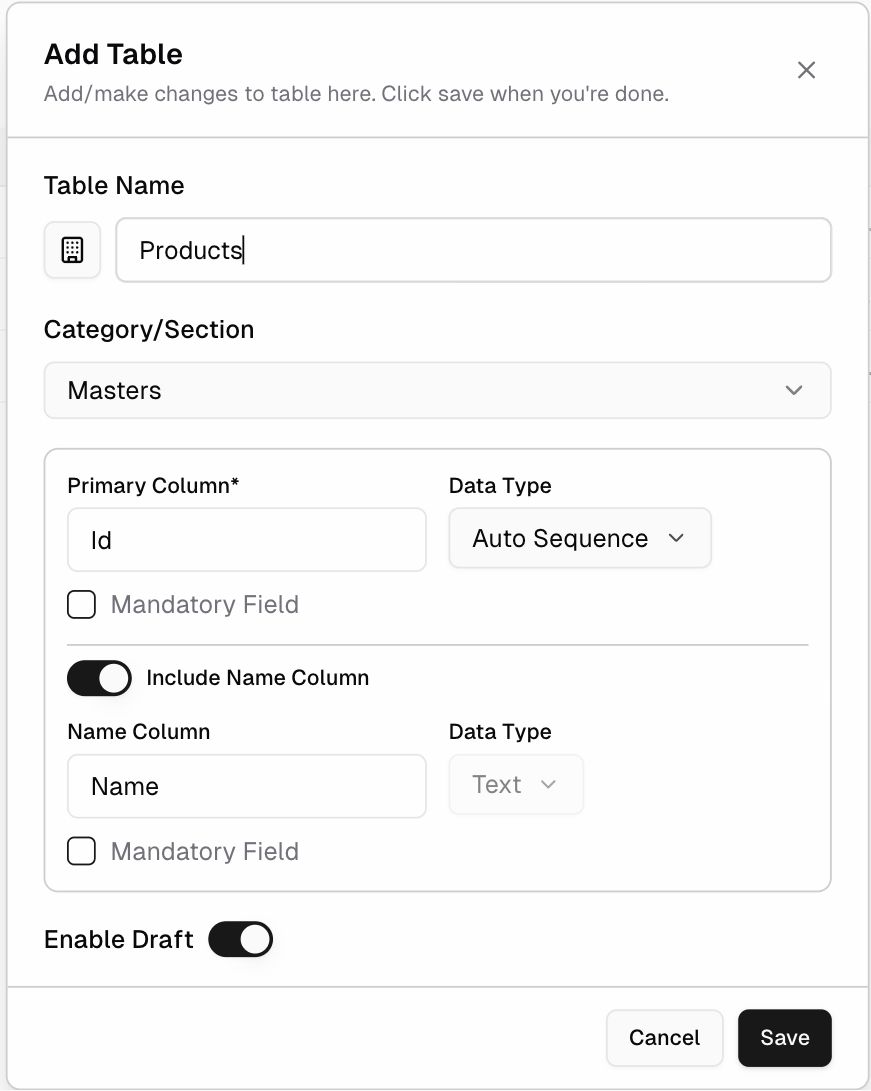
- Fill in the Add Table dialog:
| Setting | Description |
|---|---|
| Table Name | For example Orders. Click the icon button to choose an icon (you can search for one). |
| Category/Section | The sidebar group. Choose an existing one, or click +, type a new name, and press Enter. |
| Primary Column | The identifying field (default Id). Data Type: Auto Sequence, Text, Long Text, Number, or Date. Optionally tick Mandatory Field. |
| Include Name Column | Adds a Name text field (on by default). Rename it or make it mandatory if you need to. |
| Enable Draft | Lets users save incomplete records as Drafts. |
- Click Save. The new table opens in a tab.
Create a table by importing a file
Click + → Import (“From a CSV, Excel, or XML file”). ERP•AI creates a table from your file. See Import and export.
Fields every table has automatically
| System field | Meaning |
|---|---|
| Id (Auto Sequence) | A unique record number (0000001, 0000002…) |
| Sequence Format ID | The numbering format used for the Id |
| Created At / Updated At | When the record was created or last changed |
| Created By / Updated By | Who created or last changed the record |
| Draft | Whether the record is a draft (when drafts are enabled) |
When another table links to this one through a Reference field, ERP•AI also adds a Related … field (for example Related Orders on Customers) so you can see the linked records from both sides.
The table toolbar
| Control | What it does |
|---|---|
| + New table name (top right, for example + New Customers) | Opens the form to create a record |
| + Column | Adds a field. See Field types |
| Sort (↑↓) | Sort records. See Sort, filter, group, and search |
| Filter (funnel) | Filter records |
| Group (layers) | Group records by a field |
| Refresh | Reload data |
| Locate column (target) | Find a column and jump to it |
| Search (magnifier) | Search records in this table |
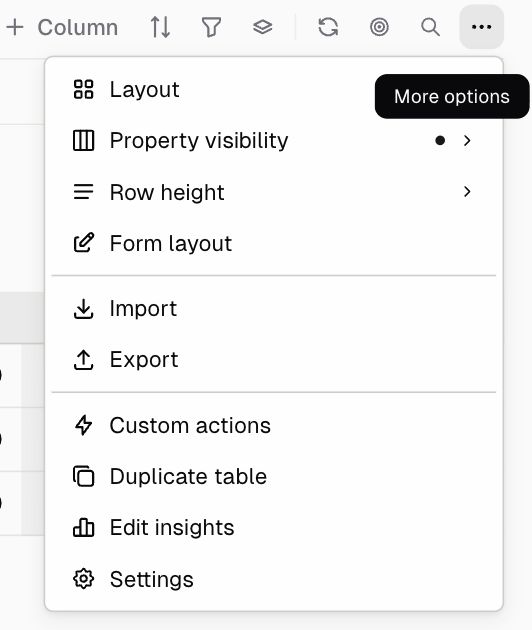
| ⋯ More options | Layout, Property visibility, Row height, Form layout, Import, Export, Custom actions, Duplicate table, Configure insights, Settings, Delete table |
The record count (“1 record”) appears on the left, and pagination (“1 of 1 records”) at the bottom.
Open ⋯ → Settings, or press Shift+S.
| Setting | What it does |
|---|---|
| Table name and icon | Rename the table or change its icon |
| Description | Internal description of the table |
| Enable Draft | When on, records can be saved as drafts without filling in mandatory fields |
| Trigger Locking on Edit | Locks a record while someone is editing it, so two people can’t overwrite each other’s changes |
| Open Record in View Mode | Records open read-only first. Users switch to edit mode on purpose. |
Click Save to apply your changes.
Other table options (⋯ More options)
| Option | Purpose |
|---|---|
| Layout | Switch between Table, Board, Calendar, Gallery, Timeline, and Ledger. See Layouts |
| Property visibility | Show or hide columns in this layout |
| Row height | Make rows more compact or taller |
| Form layout | Design the create/edit form. See Form Layout Editor |
| Import / Export | See Import and export |
| Custom actions | Add bulk-action buttons. See Custom actions |
| Duplicate table | Copy the table’s structure |
| Configure insights | Add KPI cards above the table. See Table insights |
| Settings | Table Properties (see above) |
Sidebar options for a table
Hover over the table in the sidebar and click ⋯:
- Edit: open table settings
- Move to section: move the table to another category
- Duplicate: copy the table
- Delete: move the table to Trash
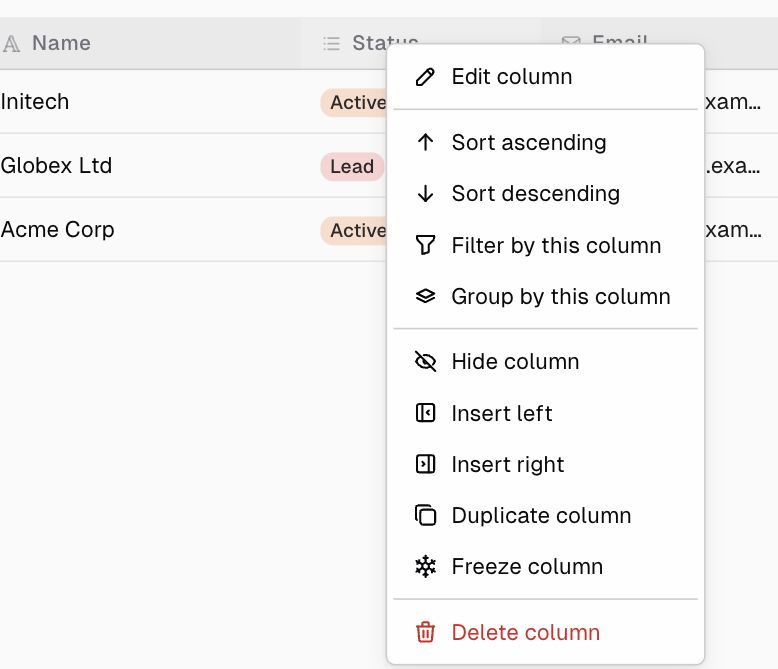
Column (header) options
Click a column header to: Edit column, Sort ascending / descending, Filter by this column, Group by this column, Hide column, Insert left / right, Duplicate column, Freeze column, or Delete column.
Tips
- Use Masters for reference data (Customers, Products, Vendors) and Transactions for day-to-day activity (Orders, Invoices, Tickets).
- Link tables with Reference fields. Don’t type IDs into text fields.
- Use a Select field for a short, fixed list of choices instead of a separate table.