Importing data into a table
Proto prepares and validates your file. You run the import in the ERP•AI app.
Step 1: give Proto the file
Attach your file and name the target, for example “Import this into the Suppliers table.” If the table doesn’t exist yet, Proto tells you to start from the app home.
Step 2: review the check
Proto compares the file against the table’s columns and reports:
- header mismatches
- missing required columns
- values in the wrong format
- select values that aren’t valid options
- blank or summary rows
Step 3: get a cleaned copy
If needed, Proto writes a cleaned copy of the file. It lists what it changed, what it dropped and what it left alone because it was unclear.
Step 4: open the importer
Open the link Proto gives you. Then click + at the top of the app sidebar (next to Search) and choose Import, or press ⌘ K (Ctrl + K on Windows and Linux) and search for “import.” For a new table, choose the new-table option.
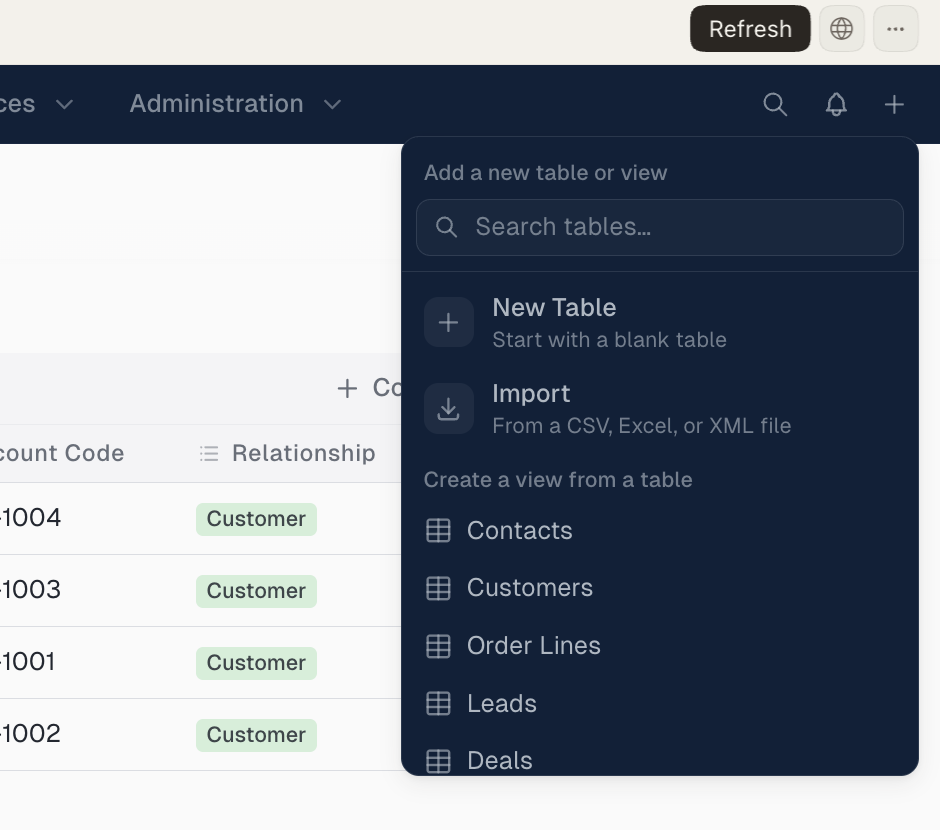
Step 5: upload and map
Upload the cleaned file. The importer matches columns and detects types, and you can adjust the mapping.
Note: The importer accepts CSV, Excel and XML files. Proto converts other formats, such as JSON or a table in a PDF, before you import.