Build your first workflow
In this example you’ll build a workflow that runs whenever a new Order is created and looks up the customer’s details. You can then add a step that emails the customer or posts to Slack.
Before you begin
- Your app role needs the Workflows → Create/Edit permissions.
- For outside services (Gmail, Slack…), add a connection first under App Settings → Connections.
- To send email, add an SMTP connection first (your email provider’s server details), under App Settings → Connections. The Email node sends through it. See Connections.
Step 1: Create a blank workflow
- Go to Automation → Workflows.
- Click + New workflow ▾ → Blank.
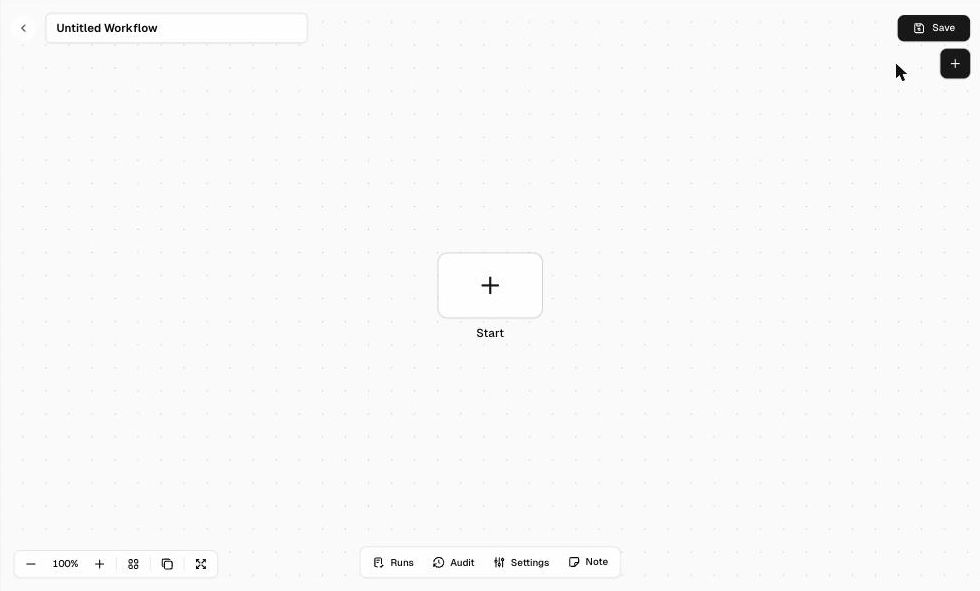
- The workflow editor opens with an Untitled Workflow and a Start block on the canvas.
- Click the title and rename it, for example
Notify on new order.
Step 2: Add the trigger
- Click the + Start block. The Add node panel opens.
- Choose Platform Trigger (“Triggers workflow on app events”).
- In the trigger’s Configure tab:
- Event Type: On Record Create
- Table: Orders
- Trigger Conditions (optional): turn it on to run only for matching records, for example Total > 1000
- Close the node panel (×).
Step 3: Add action steps
- Click the + to the right of the trigger node.
- The Add node panel opens (“Connecting from Platform Trigger”). Search for a node or browse the categories: Trigger, Logic, Transform, AI, Communication, CRM, Custom, Developer, ERP, Finance, IT, Productivity.
- For example, add ERP AI to read the customer record:
- Credentials: select a credential (or open Manage Connections)
- App Source: Current app
- Operation: Get Single Record
- Table: Customers, then filter by the order’s Customer
- Add more nodes. For example, If to branch on a value, and Email or Slack to send a message.
Using data from earlier steps
Each node panel has three columns:
- Input (left): data from earlier nodes, shown as Schema, Table, or JSON. Built-in variables include
$now(timestamp),$today(YYYY-MM-DD),$workflow,$execution,$vars, and$env. - Configure / Settings / History (middle): the node’s settings.
- Output (right): what the node produced on its last run.
Drag fields from the Input panel into node settings, or reference them in expressions.
Example: email the customer when an order is approved
- Use a Platform Trigger with Event Type: On Record Update and Table: Orders.
- Turn on Trigger Conditions and add the condition Status is Approved. Check the condition options in the trigger node so it runs only when the order has just been approved, not on every later edit.
- Add an Email node and choose your SMTP credential.
- Fill in who it goes to, the subject, and the message. Drag fields such as the customer’s email and the order number from the Input panel.
- Test with one order (Step 4), then activate (Step 5).
Step 4: Test
Click ▶ Run on a node (or on the trigger) to test it. Check the Output panel, then open Runs (bottom toolbar) to see the full run.
Step 5: Save and activate
- Click Save (top right).
- Open Settings (bottom toolbar), check the Name, Description, Timeout, and Timezone, and switch Status from Inactive to Active.